Auto-Culling: How AI Removes Duplicate and Bad Photos
Pixeva Team
Auto-Culling: How AI Removes Duplicate and Bad Photos
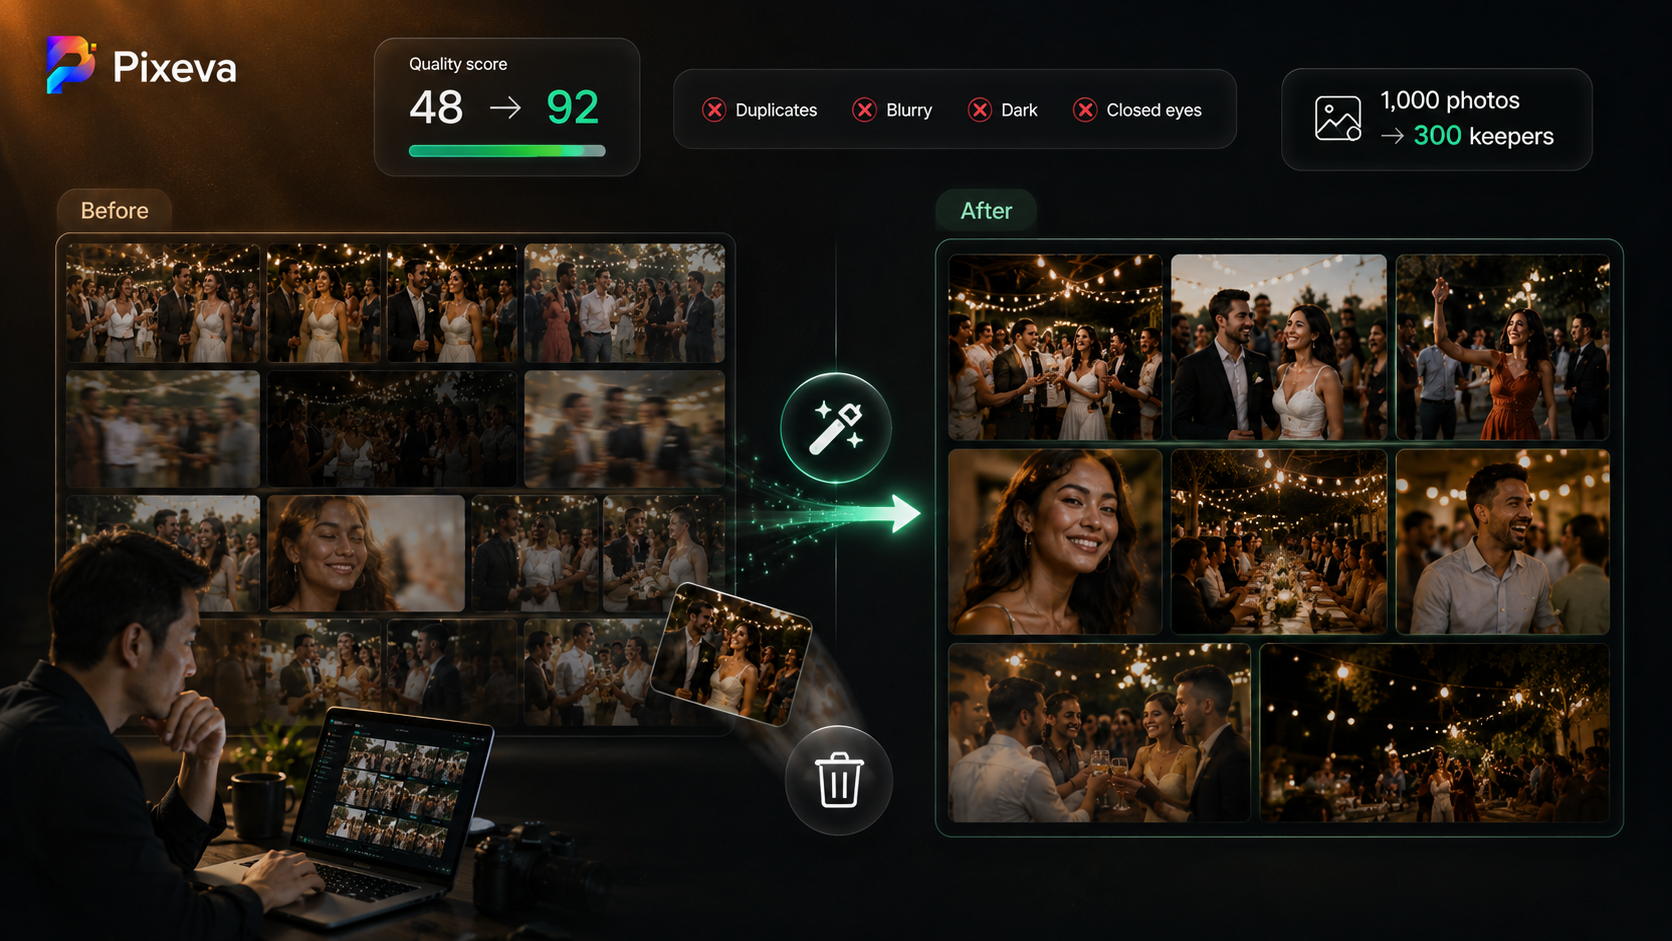
You finish an event with 1,200 photos. You know only 300–400 are truly worth sharing.
The hard part is not taking photos—it is culling: removing duplicates, fixing the “almost the same” burst shots, and cutting blurry, dark, or awkward frames before guests ever see them.
Auto-culling uses AI to score and filter photos so you start from a cleaner gallery, faster. This guide explains what gets removed, how scoring works, who benefits, and how to keep human judgment in the loop.
Note: Auto-cull behavior and controls depend on your plan and product settings. Always review before publishing sensitive galleries.
What is auto-culling?
Auto-culling is an automated quality pass over a gallery that typically:
- Detects near-duplicate images (burst shots, same pose, tiny differences)
- Flags technical issues (blur, poor exposure, heavy noise)
- Flags some content issues (e.g. closed eyes—when supported)
- Assigns a quality score to help sort “keepers” vs “review” vs “reject”
It is not a replacement for creative editing. It is a first-pass filter that saves hours.
The culling problem (why manual does not scale)
Weddings and large parties
- Multiple photographers + guest uploads = duplicates everywhere
- Guests do not want 9 versions of the same group hug
- You risk looking unprofessional if the gallery feels “bloated”
Conferences
- Hundreds of stage shots that look identical from a distance
- Many back-of-room photos with low subject clarity
Any high-volume event
Manual culling at 1,000+ images can take hours per event. Auto-cull compresses the first pass to minutes.
What AI typically removes (or flags)
Exact rules vary by product, but common categories include:
1) Near-duplicates
Burst mode, holding-the-pose shots, or multiple photographers capturing the same moment.
Goal: keep the best frame, drop the rest.
2) Blurry / out-of-focus
Motion blur, missed focus, camera shake.
3) Poor exposure
Very dark, very blown highlights, unusable noise.
4) Bad expressions (when supported)
Closed eyes, awkward mid-blink faces in key shots.
5) Low composition value (sometimes)
Extreme crops, accidental floor shots, lens cap moments (if detected).
Important: auto-cull should be reviewable, not a silent delete-everything black box—unless you explicitly choose that workflow.
How quality scoring works (simple mental model)
Most systems combine signals such as:
- Sharpness (edge clarity)
- Exposure balance
- Face visibility (if faces matter for the event)
- Duplicate similarity (embedding or pixel similarity)
Photos land in buckets like:
- Keep — strong score, unique moment
- Review — borderline; human decision
- Reject — clear technical failure or duplicate
Think of it as triage, not final art direction.
Recommended workflow for photographers and organizers
Step 1: Upload everything (or ingest from contributors)
Get the full set into one gallery first. Culling works best when AI sees the whole event.
Step 2: Run auto-cull pass
Let AI generate reject/review/keep groupings.
Step 3: Human review (fast)
Spend time only on:
- Review bucket
- Must-keep emotional moments that AI might underrate (speeches, low light candids)
Step 4: Publish the curated gallery
Guests experience a tighter, higher-quality set—less scroll fatigue.
Step 5: Keep overrides documented
If a client insists on a “technically weak” but emotionally critical photo, keep it. AI is a helper, not the client.
Before / after example (typical outcomes)
Input: 1,000 photos after a wedding
After auto-cull (illustrative): ~280–350 keepers + ~100 review + remainder rejected
Results depend on shooting style, lighting, and duplicate rate.
Benefits:
- Faster delivery timeline
- Less storage and bandwidth
- Higher guest satisfaction (“every photo feels good”)
Who benefits most?
Wedding photographers
- Deliver galleries that feel curated, not raw dumps
- Reduce post-production labor cost
- Fewer client complaints about “too many similar photos”
Event planners
- Professional presentation for sponsors and stakeholders
- Faster turnaround for marketing recaps
Brands and activations
- Cleaner sets for social teams
- Less time hunting for one usable frame among 40 duplicates
Limitations and how to avoid mistakes
Do not blindly trust rejects
AI may drop:
- Artistic motion blur you intended
- Dark but moody shots
- Critical moments with partial face visibility
Fix: always skim Review and spot-check Reject for must-haves.
Duplicates are not always bad
Sometimes clients want a burst sequence. Keep a separate album or disable duplicate removal for that segment.
Privacy and consent
Culling still processes personal images. Follow your privacy policy and retention rules like any other AI feature.
Auto-cull + other gallery features
Auto-cull pairs well with:
- Face clustering — organize people after the set is lean
- Smart albums — highlight moments on a cleaner base
- Analytics — see what guests engage with post-cull
- Bulk download — smaller, better zip exports
Each step improves a different part of the pipeline; culling is the quality gate.
Quick checklist before you enable auto-cull
- Confirm whether rejects are hidden or deleted (know your settings)
- Review Review bucket before publishing
- Communicate to clients if gallery size will shrink (set expectations)
- Keep a backup of full RAW/original outside the gallery if required by contract
- Test on one past event to calibrate trust in the tool
Conclusion
Auto-culling is how modern event teams escape the “1,000 photo guilt” trap. AI handles the repetitive filtering—duplicates, blur, exposure—so you spend time on story and delivery, not endless grid clicking.
Used with a short human review, it is one of the highest-ROI workflow upgrades for high-volume events.
Auto-cull your next event gallery with Pixeva: (https://pixeva.co)
Keep exploring with Pixeva
Want to put this into practice? These pages go deeper: